True expedition preparedness isn’t about a gear list; it’s about mastering systems designed to anticipate and mitigate catastrophic failure.
- Your clothing and shelter are not just items, but an integrated system for managing moisture, energy, and morale under environmental hostility.
- Navigation and communication tools are useless without pre-established protocols for when they inevitably fail or signal is lost in complex terrain.
Recommendation: Shift your focus from *what* gear to bring, to *why* systems fail and how to build personal redundancy for each critical function.
A high-altitude sheep hunt represents the pinnacle of mountain hunting. It’s an investment of time, money, and immense physical effort. The single greatest fear, one that keeps serious hunters awake at night, isn’t the terrain or the animal; it’s equipment failure. A broken tent pole, a frozen water filter, or a dead GPS miles from anywhere can transform a bucket-list expedition into a survival situation. The internet is saturated with advice to “layer up” or “pack light,” but this generic counsel is useless when a blizzard descends upon you at 10,000 feet.
The conventional approach focuses on a checklist of items. The professional approach, the one that ensures you return safely, focuses on a failure-point analysis of systems. The fundamental flaw in most gear planning is assuming your equipment will work as advertised. We assume the contrary. Your preparedness is not measured by the brand names in your pack, but by the robustness of your protocols when that gear breaks, freezes, or is lost.
This guide abandons the simple gear list. Instead, we will dissect the critical operational systems required for a high-altitude hunt. We will analyze their most common and dangerous failure points and provide expedition-grade strategies to build in the redundancy that truly matters. This isn’t about what to buy; it’s about how to think, prepare, and operate when everything goes wrong.
Summary: A Systems Approach to High-Altitude Hunt Preparedness
- Why Merino Wool Outperforms Synthetics in Variable Mountain Climates?
- How to Use a GPS Device When Satellites Are Obstructed by Canyon Walls?
- Bivy Sack vs. 4-Season Tent: Which Is Better for Solo Alpine Hunting?
- The Water Filtration Mistake That Ends Expeditions Early
- How to Optimize Your Satellite Messenger for Quick Rescue Coordination?
- How to Build a Debris Hut If You Lose Your Tent?
- Medevac vs. Trip Cancellation: Which Insurance Covers a Broken Leg on a Mountain?
- How to survive an Unexpected Blizzard While Miles from the Truck?
Why Merino Wool Outperforms Synthetics in Variable Mountain Climates?
In the dynamic environment of the high alpine, where temperature swings of 30 degrees in an hour are common, moisture management is synonymous with survival. Synthetics are excellent at wicking sweat away from the skin, but their fatal flaw is that they do nothing with that moisture once it’s in your next layer. Merino wool operates on a different principle. Its fibers are hygroscopic, meaning they can absorb moisture vapor before it even turns to liquid sweat. In fact, research shows merino wool can absorb up to 30% of its weight in moisture before feeling damp to the touch. This prevents the clammy, cold feeling that sets in when you stop moving after a hard climb.
However, an all-merino system is not the answer. The professional solution is a hybrid layering system that leverages the strengths of both materials. This involves a thin merino base layer for its thermoregulation and multi-day odor resistance. Over this, during high-output activities like a steep ascent with a heavy pack, a synthetic grid fleece acts as a transport layer, rapidly moving bulk moisture away from the merino and out of the system. This keeps your core merino layer drier for static periods, like glassing, where hypothermia risk is highest.
Case Study: The Alaska Dall Sheep Hunt Clothing System
During a 10-day Dall sheep hunt in Alaska, a hunter utilized this exact hybrid strategy. His system, built around merino wool base layers for odor control and comfort, was supplemented with synthetic mid-layers during high-output climbs. This approach proved effective through temperature swings from 30°F to 60°F, handling everything from glacier crossings to steep, sweat-inducing ascents. The key was keeping the merino base layers as dry as possible during movement by letting the synthetic layers handle the heavy lifting of moisture transport. For long, cold glassing sessions, he added insulation like puffy pants and down mitts, proving the system’s adaptability.
This systematic approach avoids the “all or nothing” debate and instead creates a functional toolkit for managing your microclimate. Your base layer isn’t just a shirt; it’s the foundation of your energy conservation system.
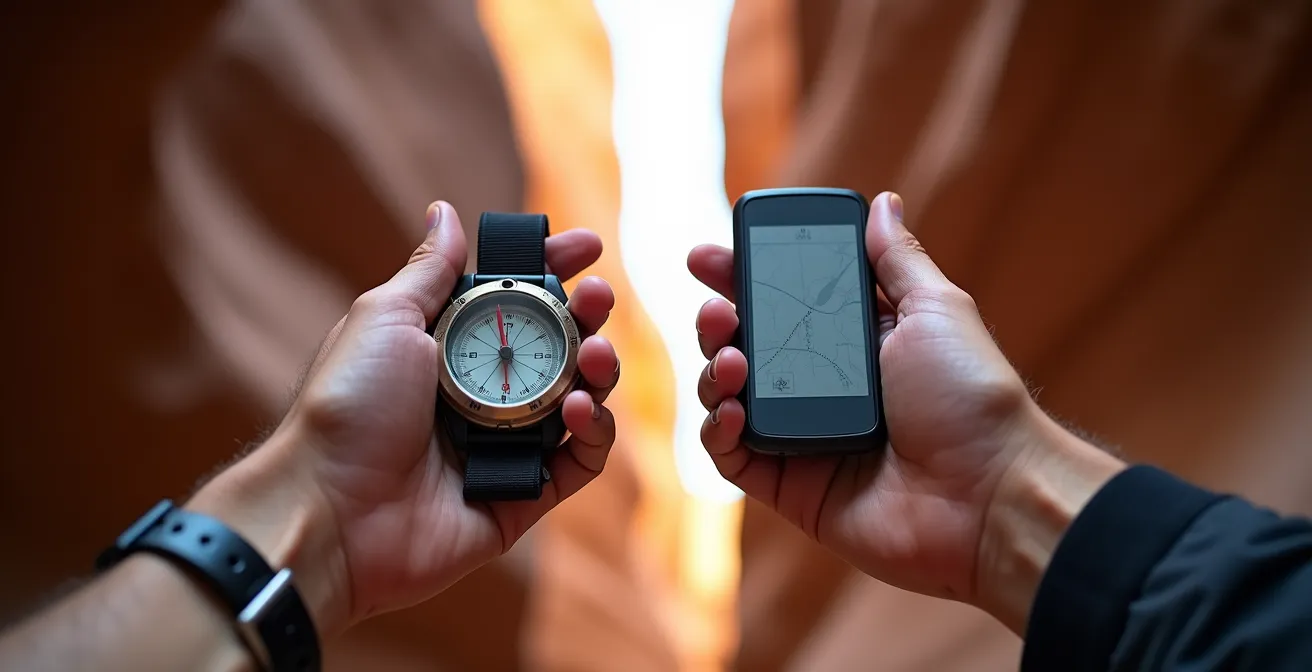
How to Use a GPS Device When Satellites Are Obstructed by Canyon Walls?
A modern GPS with multi-constellation support is an incredible tool, but it is not infallible. The single biggest assumption hunters make is that it will always have a signal. In the steep, narrow canyons and deep drainages of sheep country, satellite signals are frequently obstructed. When your GPS screen reads “Acquiring Satellites,” you are effectively lost if you don’t have a backup system. This is not a gear problem; it’s a protocol problem. The non-negotiable backup is the centuries-old skill of dead reckoning, augmented with modern tools.
Dead reckoning is the process of calculating your current position by using a previously determined position, and then incorporating estimations of speed, heading, and time. It is a mental and procedural skill that must be practiced. Relying solely on a digital device without mastering its analog backup is a critical failure point in any navigation system. The following protocol should be hardwired into your brain before you ever step into a canyon.
Your Action Plan: Dead Reckoning Protocol for GPS Dead Zones
- Mark Last Fix: Mark your last known good GPS fix with a waypoint. Note the exact time and your barometric altitude before entering the canyon or dead zone.
- Take a Bearing: Use a reliable magnetic compass to take a precise bearing of your intended direction of travel. You must know and account for the local magnetic declination.
- Track Progress: Count your paces (after determining your personal pace count for 100 meters on similar terrain) or use timed estimates based on your known travel speed.
- Plot Your Position: Every 30 minutes, stop and plot your estimated position on a physical, waterproof map using your pace count and compass bearing from your last known point.
- Maximize Satellite Acquisition: Before entering the canyon, ensure your GPS is set to use all available satellite constellations (e.g., GPS + GLONASS + Galileo) to maximize the chances of catching a signal.
This protocol transforms you from a passive user of technology into an active navigator. Your GPS becomes a tool for confirming your position, not the sole determinant of it.
Bivy Sack vs. 4-Season Tent: Which Is Better for Solo Alpine Hunting?
The choice between a bivy sack and a tent is often framed as a simple trade-off between weight and comfort. This is a dangerously simplistic view. Your shelter is your only bastion against environmental hostility; it is a tool for drying gear, recovering physically, and, most importantly, maintaining your psychological margin. On a long, solo hunt, the mental toll of being exposed to the elements without respite can be as debilitating as physical exhaustion.
Case Study: Mark’s Alaska Shelter Choice Evolution
Veteran hunter Steve Speck of Exo Mountain Gear tells of choosing a Hilleberg Niak tent for a 10-day Dall sheep hunt specifically after losing other, lighter shelters to severe wind storms on previous hunts. The tent provided the crucial ability to dry gear during a hunt that saw snow and rain. More critically, during a blizzard that dumped snow on day nine, the tent offered the psychological comfort and security needed to weather the storm and maintain the mental fortitude to continue the hunt. The weight penalty was a calculated cost, justified by the resilience it added to his entire expedition system.
The decision isn’t just bivy vs. tent. A third option, the floorless pyramid shelter, offers a compelling middle ground. It provides significantly more space and weather protection than a bivy for a marginal weight increase, and its condensation management is often superior to both. The choice depends on a brutal self-assessment of the hunt’s duration, expected weather, and your personal tolerance for exposure.
This comparative table breaks down the critical factors beyond just weight, providing a framework for a strategic decision, not a preferential one.
| Factor | Bivy Sack | 4-Season Tent | Floorless Pyramid |
|---|---|---|---|
| Weight | 8-16 oz | 3-5 lbs | 16-24 oz |
| Pack Space | Minimal | Significant | Moderate |
| Weather Protection | Limited | Excellent | Good |
| Condensation Management | Poor | Good | Excellent |
| Gear Storage/Drying | None | Excellent | Good |
| Setup in Wind | Easy | Challenging | Moderate |
| Psychological Comfort | Low | High | Moderate |
Choosing a bivy to save two pounds may seem smart at the trailhead, but it’s a foolish gamble when you’re trying to stay sane through 36 hours of freezing rain. Your shelter is a recovery tool; choose it accordingly.
The Water Filtration Mistake That Ends Expeditions Early
Dehydration and waterborne pathogens are well-known threats, but in high-altitude hunting, the most insidious threat to your water system is the cold. The single most common and catastrophic mistake is allowing your water filter to freeze. Modern hollow-fiber filters (like the Sawyer Squeeze or Katadyn BeFree) are incredibly efficient, but they have a critical failure point: once the microscopic fibers freeze, the ice crystals expand and create micro-tears, rendering the filter useless. After a single freeze, it can no longer be trusted to remove harmful bacteria and protozoa. As water filtration experts confirm that hollow fiber filters become useless after freezing, you are left with no safe way to procure water.
This is not a rare occurrence. On any late-season hunt, temperatures will drop below freezing overnight. A filter left in your pack’s side pocket or hanging from a tree is a guaranteed failure. You must treat your filter with the same care as your electronics, implementing a strict cold-weather protocol. Your system must also include a backup method that is impervious to cold, such as chemical treatment drops or a UV sterilizer.
A failure-proof water strategy involves these non-negotiable actions:
- Prevent Freezing: The number one rule is to sleep with your filter in your sleeping bag. During the day, store it in an inside pocket or deep in the center of your pack for insulation.
- Purge After Use: Immediately after filtering, shake out as much excess water as possible. The less water inside, the lower the risk of a damaging freeze.
- Carry a Backup: Always carry a chemical backup like chlorine dioxide drops (Aquamira). They are lightweight, unaffected by cold, and your lifeline if your primary filter is compromised.
- Pre-filter Glacial Silt: On many sheep hunts, water sources are full of glacial silt which clogs filters rapidly. Always pre-filter this water through a bandana or dedicated pre-filter to extend the life of your main filter.
Treating your water filter as a disposable item is a rookie mistake. It is a critical piece of life-support equipment that demands a dedicated protocol.
How to Optimize Your Satellite Messenger for Quick Rescue Coordination?
Carrying a satellite messenger like a Garmin inReach or ZOLEO gives a false sense of security. The device itself is only half the system. The other half is the clarity and efficiency of your communication. In an emergency, every second counts. Fumbling with a tiny keyboard to type out a custom message explaining your situation, location, and needs is a waste of precious time and battery. A professional hunter pre-programs their device with clear, concise, and actionable messages before ever leaving home.
The SOS button should be reserved for true life-or-death situations. For everything else—a twisted ankle that prevents you from hiking out, a weather delay, or a non-urgent need for assistance—custom preset messages are far more effective. These messages must be coordinated with your emergency contact beforehand, so they know exactly what each message means and what action to take. The goal is to provide Search and Rescue (SAR) teams with the maximum amount of information with a single button press.
Your presets should follow a logical template for escalating severity. This removes ambiguity and allows for a measured response. Consider this SAR-ready template:
- Preset 1 (Check-in): “All OK. On schedule at this location. No reply needed.” This conserves battery on both ends.
- Preset 2 (Non-Urgent Assist): “NON-URGENT ASSIST NEEDED. Have mobility issue but am safe with shelter/food. Requesting pickup at this location tomorrow AM. Will update.” This tells your contact to coordinate logistics, not a full-blown rescue.
- Preset 3 (Urgent/Medical): “MEDICAL EMERGENCY. [NATURE OF INJURY]. Conscious and stable at this location. INITIATE RESCUE PROTOCOL.” This gives SAR a clear picture of what they are dealing with before they even get on the helicopter.
Before your hunt, you must brief your emergency contact on the difference between hitting the SOS button (life-threatening) and sending a custom message. Test every preset message. Your satellite device is not a toy; it is a professional rescue coordination tool and must be treated as such.
How to Build a Debris Hut If You Lose Your Tent?
The term “debris hut” conjures images of a primitive shelter made of logs and leaves. In the sparse, exposed environment of the high alpine, the materials and, more importantly, the time required to build such a structure are luxuries you do not have. If you lose your primary shelter to wind or an accident, you will not be building a traditional debris hut. Your survival depends on your ability to construct an alpine emergency bivy using the components you are already carrying: your pack, your pad, your clothing, and your rain gear.
The principle is not to build a structure from scratch, but to create a micro-shelter that minimizes convective heat loss and protects you from wind and moisture. The first step is the most critical: find a micro-terrain feature. A small rock outcropping, a shallow depression, or a dense cluster of subalpine firs can provide 80% of your shelter by acting as a natural windbreak. Do not waste energy trying to build walls; use the landscape to your advantage.
Once you have a windbreak, the protocol is systematic:
Action Plan: Alpine Emergency Shelter Using Your Pack System
- Ground Insulation First: Immediately unroll your sleeping pad. This is your primary barrier against conductive heat loss into the ground. Place stuff sacks filled with non-essential gear underneath it for extra insulation.
- Position the Windbreak: Position your backpack on your windward side, secured with trekking poles driven into the ground, to augment your natural windbreak.
- Create the Bivy Cocoon: Get into your sleeping bag. Wrap your emergency space blanket or bivy sack around the bag, followed by your rain gear (jacket and pants) as a durable, waterproof outer shell.
- Seal the System: Use your pack’s rain cover as a final outer shell over your torso and legs. Secure the entire cocoon with any available cordage to minimize drafts.
- Fuel the Furnace: Before getting into the shelter, force-feed yourself 500+ calories of high-fat food. Your body needs fuel to generate heat through the night.
This system turns your pack’s contents into a layered, multi-functional survival shelter. It is a faster, more thermally efficient solution than attempting to build a debris hut in an environment that offers no debris.
Medevac vs. Trip Cancellation: Which Insurance Covers a Broken Leg on a Mountain?
A guided sheep hunt is a significant financial investment, often exceeding the cost of a new car. The assumption that your standard health insurance will cover you in the event of an accident in the backcountry is a catastrophic financial mistake. A broken leg on a remote mountain requires a helicopter evacuation, which can easily cost tens of thousands of dollars. Distinguishing between the different types of insurance is not a mere formality; it’s a critical component of your financial risk management.
Ripcord Evacuation, Medical Rescue, and Travel Insurance is highly recommended for all of our clients.
– Golden Eagle Outfitters, Alaska Sheep Hunt Preparation Guide
The recommendation from experienced outfitters is clear because they have seen the financial devastation an accident can cause. The terms “Search & Rescue,” “Medical Evacuation,” and “Trip Interruption” are not interchangeable. Each covers a very specific, and separate, phase of a potential disaster. Understanding what is—and what is not—covered is essential before you purchase a policy.
This table clarifies the distinct roles of each coverage type, a distinction that is often lost in the fine print. As this breakdown of hunt insurance shows, relying on a single policy is often insufficient.
| Coverage Type | What It Covers | What It Doesn’t Cover | When You Need It |
|---|---|---|---|
| Search & Rescue | Initial location and extraction to nearest road/facility | Medical transport to hospital | Lost or injured in field |
| Medical Evacuation | Transport from field location to medical facility | Trip costs, gear loss | Medical emergency requiring hospital |
| Trip Cancellation | Non-refundable trip costs if cancelled before departure | Costs after trip begins | Injury/illness before hunt |
| Trip Interruption | Unused portion of trip if cut short | Medical costs, evacuation | Must leave hunt early |
For a high-risk, high-cost expedition like a sheep hunt, a comprehensive policy that combines medical evacuation and trip interruption is not a luxury; it is a mandatory piece of gear. It protects you from a financial catastrophe that could be far worse than the physical injury itself.
Key Takeaways
- System Redundancy Over Gear Brands: Your survival depends on your protocols for when gear fails, not the logo on your jacket.
- Master Failure Protocols: Practice dead reckoning, know how to prevent your filter from freezing, and pre-program your satellite messenger. These skills are your true life insurance.
- Think Multi-Function: Your pack contains multiple shelter and survival systems, not just one tent. Learn to see your gear as an integrated toolkit.
How to survive an Unexpected Blizzard While Miles from the Truck?
The most dangerous phenomenon in sheep hunting is not a grizzly bear or a fall; it’s “sheep fever.” It’s the moment when rational judgment is overridden by the adrenaline of a stalk, causing you to drop your pack and survival gear for a “quick” pursuit. This is how hunters die. Mountain weather is not just unpredictable; it is violently hostile and can turn a clear afternoon into a whiteout blizzard in under an hour.
Case Study: 18 Hours of Survival on a Dall Sheep Hunt
An 8-day Dall sheep hunt provides a chilling example. Two hunters dropped their packs to pursue rams, ultimately finding themselves 4,000 vertical feet above their gear as night fell and a brutal storm rolled in. They spent the next 18 hours huddled together under a single emergency survival blanket, enduring near-hypothermic conditions. They survived, but the experience drove home the critical lesson: never separate from your survival gear. The incident reinforced that sheep fever can be lethal and that a “quick stalk” is a myth in the high mountains.
If you are caught in an unexpected blizzard, your actions in the first five minutes will determine your outcome. Panic is the enemy; a calm, systematic protocol is your salvation. You must immediately shift from hunter to survivor.
Your immediate response should be automatic:
- STOP: Stop moving immediately. Mark your position with a trekking pole or GPS waypoint. Movement wastes energy and increases the risk of getting lost.
- LAYER UP: Put on all your layers before you get cold. Add your puffy insulation and your hard shell. It’s far harder to regain warmth than to preserve it.
- FORCE-FEED: Consume 300+ calories of high-fat food (nuts, chocolate). Your body is about to enter a metabolic war against the cold; give it ammunition.
- COMMUNICATE: Send a satellite message: “Weathering storm at [location]. Safe. Will update in 2 hours.” This alerts your contact without triggering an unnecessary rescue.
- CREATE A WINDBREAK: Use your pack and trekking poles to create an immediate shield from the wind. This single action can dramatically reduce convective heat loss.
Surviving a blizzard is less about endurance and more about immediate, correct action. Your gear is useless if you don’t have the discipline to keep it with you and the knowledge to deploy it systematically.
The ultimate goal is to return home safely, with stories to tell. That requires shifting your mindset from a hunter who uses gear to an expeditionary expert who commands systems. To put these strategies into practice, your next step is to perform a failure-point analysis on your own equipment and develop your personal protocols for every critical system.