
The difference between a successful hunt and a catastrophic failure is not luck; it’s a diagnostic mindset that identifies problems before they occur.
- Internal corrosion, not external scratches, is the primary silent threat to accuracy and safety.
- Optic stability depends on precise torque values, not just “tight enough” screws or thread locker.
- Preventative component replacement (like springs) is non-negotiable for ensuring reliable function in harsh conditions.
Recommendation: Adopt a pre-hunt inspection protocol that focuses on diagnosing the hidden points of failure inside your firearm, treating it as a precision instrument, not just a tool.
For any serious hunter, there is no sound more devastating than the hollow “click” of a firing pin striking a dud primer when the buck of a lifetime is in your sights. It’s a moment of pure mechanical betrayal. Most hunters believe that a quick wipe-down and a coat of oil is sufficient maintenance. They treat their firearm as a durable tool that can withstand months of neglect in a safe, only to be called upon to perform flawlessly at a moment’s notice. This common approach is a gamble, and in the world of precision mechanics, luck is a poor strategy.
The conventional wisdom of “keeping it clean and dry” only scratches the surface. It fails to address the subtle, internal degradation that truly causes failures in the field. This isn’t about cosmetic care; it’s about mechanical empathy. It’s about understanding that your rifle is a system of interacting parts, where a microscopic patch of rust, an improperly torqued screw, or a fatigued spring can lead to a complete breakdown. The key isn’t just cleaning; it’s conducting a routine diagnostic inspection.
This guide moves beyond the platitudes. It will not tell you to simply oil your rifle. Instead, it will teach you to think like a gunsmith. We will dissect the most common and critical failure points that are born from off-season neglect. You will learn how to perform a forensic analysis of your firearm’s condition, focusing on the hidden areas where malfunctions are born. By adopting this 15-minute diagnostic protocol, you transform your pre-hunt preparation from a hopeful chore into a confident verification of your equipment’s readiness.
This article provides a structured approach to inspecting the most critical systems of your firearm. The following sections break down each key inspection point, offering expert guidance to ensure your rifle is not just clean, but truly field-ready.
Summary: The 15-Minute Firearm Inspection That Prevents Misfires in the Field
- Why Rust in the Bore Is More Dangerous Than External Scratches?
- How to Clean Your Action Without Removing Essential Lubrication?
- Loctite or Torque Wrench: Which Ensures Your Scope Never Shifts?
- The Safety Catch Failure That Occurs in Cold Weather
- When to Replace Your Firing Pin Spring Before It Fails?
- The Barrel Wear Sign That Means You Should Walk Away from a Used Rifle
- How to Zero Your Rifle to Minimize Unpredictable Deviations?
- How to Develop a Mental “Go/No-Go” Protocol for Every Shot Opportunity?
Why Rust in the Bore Is More Dangerous Than External Scratches?
A hunter often judges a rifle by its external condition, mistaking a few stock dings or some worn bluing as character. This is a critical error. The real danger to a firearm’s performance and safety lies hidden within the barrel. While an external scratch is a cosmetic flaw, internal bore rust is a functional cancer. It creates a rough, uneven surface that grabs onto copper and carbon fouling with every shot. This buildup isn’t just “dirt”; it is a direct threat to accuracy. It can cause unpredictable flyers that turn a guaranteed ethical shot into a potential miss or, worse, a wounded animal.
More insidiously, deep rust pits create permanent fouling traps that accelerate future corrosion and can, in extreme cases, compromise the barrel’s structural integrity. A clean, mirror-bright bore ensures the bullet travels with minimal and consistent friction, which is the foundation of accuracy. A pitted bore is an abrasive tube that actively works against precision. The first and most important part of your inspection should always be a thorough examination of the bore, because what you can’t see is precisely what will hurt you in the field. Neglecting this is like ignoring a foundation crack in a house; the problems will only compound over time.
Action Plan: 3-Step Bore Inspection Protocol
- Visual Inspection with a Borescope: As recommended by firearm inspection experts, you should utilize a rigid borescope inspection camera to check for cracks, flaws, or residue buildup. Never look directly down the barrel; a borescope is the only safe and effective tool for a detailed internal view.
- Check for Barrel Bulges: Look for a “ringed” or “bulged” barrel by checking for shadows on the exterior or by feeling for loose spots when running a tight-fitting patch through the bore. A bulge indicates a dangerous over-pressure event has occurred.
- Assess Pitting Depth: Differentiate between surface rust and deep pitting. Light surface rust can often be removed with a good solvent and brushing. However, deep pitting creates permanent traps for fouling and moisture, accelerating future corrosion and degrading accuracy.
How to Clean Your Action Without Removing Essential Lubrication?
After a season of neglect, the impulse is to flood the action with solvent and scrub every visible surface until it gleams. This “scorched earth” approach is a mistake. An action is not a simple tube; it’s a finely-tuned machine with specific lubrication requirements. Aggressively degreasing the entire assembly removes the essential, long-lasting grease from critical wear surfaces like sears and trigger components, which are not meant to be re-lubricated frequently. This can lead to a gritty trigger pull, premature wear, and even a failure to cycle.
The gunsmith’s approach is surgical. It’s about targeted cleaning, not total degreasing. The goal is to remove unburned powder, carbon fouling, and environmental debris from specific functional areas—the locking lugs, the bolt face, the extractor, and the ejector—while preserving the vital lubricant on other parts. Using tools like polymer picks, stiff nylon brushes, and compressed air allows you to dislodge debris without stripping the entire action of its protective and functional grease. This preserves the smooth, reliable function that was engineered into the firearm from the factory.
As this detailed view shows, specific tools are designed to work in the tight confines of an action. Preserving lubrication on the trigger group’s sear engagement surfaces, for example, is paramount for a crisp, consistent trigger pull. Over-cleaning can be as detrimental as neglect. According to firearm maintenance experts, the initial inspection should take place once you acquire the firearm and a proper maintenance schedule should be established, differentiating between deep cleaning and pre-hunt preparation where minimal, climate-appropriate lubricant is applied.
Loctite or Torque Wrench: Which Ensures Your Scope Never Shifts?
Many hunters believe that a liberal application of Loctite is the ultimate insurance against a scope that won’t hold zero. In reality, this is often a crude fix for an improper installation. The true key to a rock-solid optic mount is not adhesive; it’s achieving correct and consistent clamping force, which can only be done with a torque wrench. Your scope rings and bases are designed to hold the scope tube with precise pressure. Too little torque, and the scope will shift under recoil. Too much torque, and you can crush the scope tube, inducing stress on the internal lens assemblies and causing unpredictable point-of-impact (POI) shifts.
A torque wrench is a non-negotiable tool for any serious rifleman. It removes the guesswork and ensures that every screw is tightened to the manufacturer’s exact specification. As the Warne Scope Mounts Technical Team states, these specifications are critical:
Scope manufacturers have scope ring torque recommendations. 20-25 inch-pounds used to be the standard but now with lighter weight scopes with thinner tubes they vary with some as low as 15 inch-lbs. So always check your scope manufacturers torque specs.
– Warne Scope Mounts Technical Team, Torque and Scope Mounts Guide
While a small drop of a non-permanent thread locker (like Loctite 242) can prevent screws from backing out due to vibration, it is a secondary measure. The primary source of stability is, and always will be, proper torque.
Different manufacturers have highly specific requirements for their hardware, as illustrated by a recent analysis of scope mount torque values. Ignoring these is a direct path to frustration and inaccuracy.
| Manufacturer | Ring Screws (in-lbs) | Base Screws (in-lbs) | Special Notes |
|---|---|---|---|
| Badger Ordnance | 15 | 65 | 4 screws per ring design |
| Leupold | 15-28 | 14-25 | 28 for single screw rings only |
| Vortex | 15-18 | 20 | No thread locker recommended |
| Nightforce | 25 | 25-68 | 68 for crossbolt nuts |
| Warne | 25 | 25 | Dry threads only |
The Safety Catch Failure That Occurs in Cold Weather
In the controlled environment of a workshop or a temperate climate, a firearm’s safety mechanism feels positive and reliable. But in the freezing cold of a late-season hunt, things change. One of the most common and dangerous cold-weather failures is a safety catch that becomes sluggish, difficult to engage, or even freezes solid. This is rarely a fault of the mechanism itself; it is almost always a failure of lubrication. The heavy oils and greases that work perfectly at room temperature can congeal and thicken in sub-zero conditions, turning into a sticky, molasses-like substance. This thickened lubricant can prevent the small springs and detents in the safety mechanism from moving freely.
The result is a hunter who cannot disengage the safety for a shot, or far worse, a safety that feels engaged but is not fully secure, creating a significant risk. The history of warfare is filled with examples of this phenomenon. A Marine who fought in the Battle of Chosin Reservoir described how he and his comrades struggled constantly to maintain their firearms in the extreme cold. This historical lesson is directly applicable to hunters, as numerous field reports indicate that cold-weather failures are common, from frozen actions to misfires. The preventative measure is to de-grease the safety mechanism and apply a specialized, lightweight synthetic lubricant designed for cold-weather performance, or even run it completely dry as some manufacturers recommend.
A safety that functions flawlessly in your warm home can become a liability in the field. This is not a theoretical problem; it’s a well-documented issue that has plagued soldiers and hunters for generations. Trusting a firearm that has been “summer prepped” for a winter hunt is a risk that is easily avoided with proper, climate-specific maintenance. The consequences of a frozen safety range from a missed opportunity to a potential tragedy.
When to Replace Your Firing Pin Spring Before It Fails?
Of all the components in a firearm, springs are the most susceptible to silent, invisible fatigue. The firing pin spring, in particular, lives a life of violent compression and decompression. Over thousands of cycles, or even just from being left in a compressed state (i.e., with the action cocked) for extended periods, it loses its original length and force. This is known as “taking a set.” A weakened firing pin spring is the primary cause of light primer strikes, which result in the dreaded “click” instead of a “bang.” The primer fails to detonate because it wasn’t struck with sufficient force.
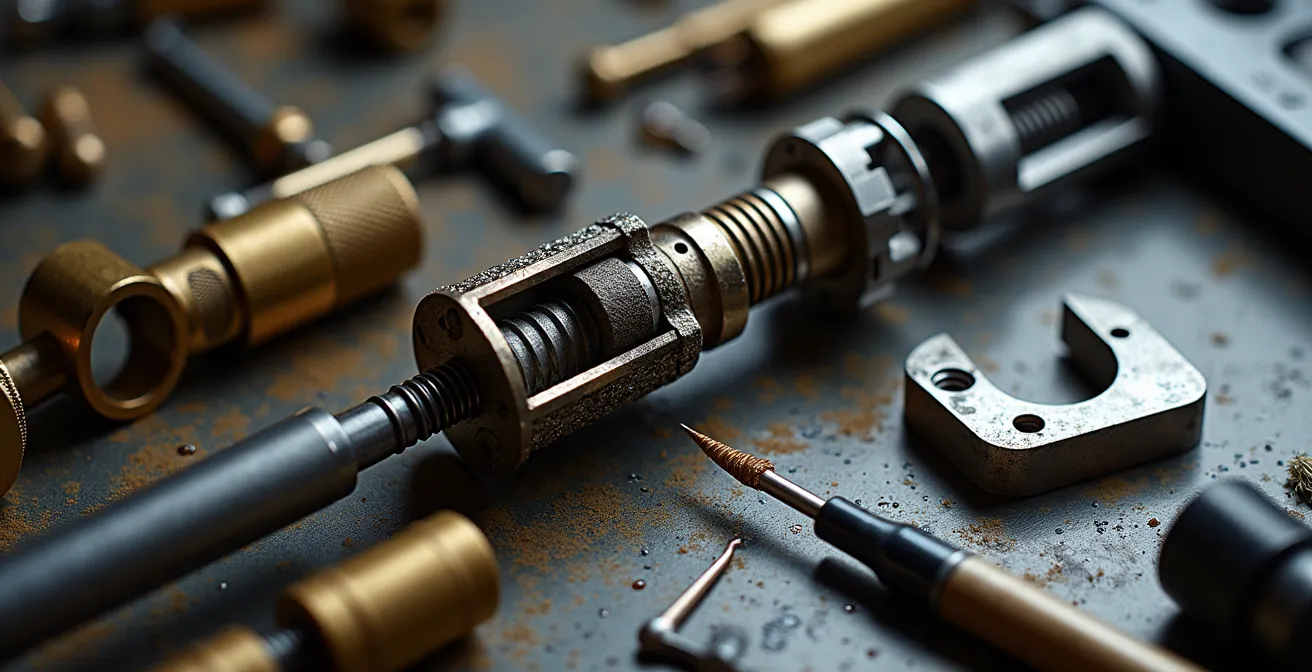
Unlike a broken part, a fatigued spring gives no obvious visual or audible warning before it fails to do its job. You cannot “see” a weak spring. The only way to manage this is through preventative replacement based on a known service life. While manufacturers rarely publish an exact round count, a gunsmith’s rule of thumb is to replace critical springs like the firing pin and extractor springs every 5,000 rounds for a centerfire rifle, or every 5-7 years, regardless of use. The cost of a new spring is negligible compared to the cost of a lost opportunity on a hunt.

As the image illustrates, the difference between a new spring and a worn one can be subtle but is mechanically significant. That small loss in length represents a major loss in kinetic energy delivered to the primer. Measuring a spring’s free length against a new, factory-spec replacement is a definitive way to diagnose fatigue. Waiting for a spring to fail is not a maintenance strategy; it’s an acceptance of eventual failure. Proactive replacement is the only way to ensure consistent, powerful primer ignition every time you pull the trigger.
The Barrel Wear Sign That Means You Should Walk Away from a Used Rifle
When evaluating a used rifle, many buyers focus on the wrong things. They check for a shiny bore and a clean crown, but often miss the most critical indicator of a barrel’s remaining life: throat erosion. The throat, or leade, is the very beginning of the rifling, just ahead of the chamber where the bullet sits before firing. This small section of the barrel is subjected to the most intense heat, pressure, and abrasive force from burning powder with every single shot. Over time, this intense blast erodes the sharp edges of the rifling in the throat, making it rough and effectively lengthening the distance the bullet has to “jump” before it engages the rifling.
A severely eroded throat is the number one cause of accuracy loss in a high-mileage rifle. Even if the rest of the bore looks pristine, a worn-out throat will prevent the rifle from shooting tight groups. You can inspect this area with a borescope, looking for a “fiery” or “alligator skin” texture where the rifling begins. Another tell-tale sign is a visual inspection of the muzzle crown; damage from steel cleaning rods or deep rifling scratches at the muzzle indicates a history of improper maintenance that likely extends to the entire barrel. A simple checklist can save you from a bad purchase.
Finally, while some pitting can be acceptable, its depth and location matter. According to post-sanding analysis, professional measurements confirm that even with significant rust removal, sufficient barrel wall thickness can remain for safe shooting. However, extensive pitting near the chamber or throat is a major red flag. When in doubt, walk away. A “good deal” on a rifle with a shot-out barrel is no deal at all; it’s a project that will require an expensive re-barreling to ever perform well again.
How to Zero Your Rifle to Minimize Unpredictable Deviations?
Zeroing a rifle is more than just aligning the crosshairs with the bullet’s point of impact. It’s about creating a stable, repeatable system that eliminates variables. One of the most overlooked sources of unpredictable deviations is mechanical stress on the scope itself, induced during mounting. As Leupold Technical Support often warns, the physical placement and pressure of the scope rings are critical. Overtightening rings can crush the maintube, while placing them too close to the turrets or the objective bell can have detrimental effects on repeatability and POI. The goal is to mount the scope in a mechanically neutral position, free from any binding or stress.
Another major variable that hunters often ignore is the “cold bore shot.” The very first shot from a clean, cold barrel will frequently impact in a different location than subsequent shots from a warmed, fouled barrel. For a hunter, this first shot is often the only one that matters. Professional shooters meticulously document their cold bore shot, aiming at a specific point on the target for their first shot of the day and noting its location relative to the main group. This data becomes invaluable. If you know your cold bore shot is consistently one inch high and left at 100 yards, you can confidently hold a corresponding amount low and right for that critical first shot in the field. Ignoring this phenomenon is to leave the most important shot of your hunt completely to chance.
Ultimately, a reliable zero is about consistency in every aspect of your process: using a solid rest, managing breathing, applying a consistent trigger press, and documenting your rifle’s unique performance characteristics. Frequent checks and a proper zeroing process ensure that the gun will perform correctly when it is needed most, whether at the range or in a critical hunting situation.
Key Takeaways
- Internal corrosion is a functional threat, not a cosmetic flaw; a clean bore is the foundation of all accuracy.
- Precise torque is non-negotiable for optic stability; a torque wrench is an essential tool, not a luxury.
- Component fatigue in parts like springs is silent but predictable; proactive replacement is the only way to prevent failure.
How to Develop a Mental “Go/No-Go” Protocol for Every Shot Opportunity?
A mechanically perfect rifle is only half of the equation for a successful and ethical hunt. The other half is the shooter’s discipline. In the heat of the moment, with adrenaline surging, it’s easy to rush a shot or take a chance that is outside your proven capabilities. This is where a pre-defined mental checklist—a “Go/No-Go” protocol—becomes an invaluable tool. It is a systematic, unemotional process that you run through in the seconds before you decide to pull the trigger. It forces you to move beyond the excitement and make a rational assessment of the situation.
This protocol isn’t complex. It’s a simple, repeatable sequence of checks that confirms you have a high probability of making a clean, ethical shot. The purpose is to build good habits, ensuring that your actions are deliberate and responsible. Armed professionals must develop these habits because their lives, and the lives of others, depend on them. For a hunter, the stakes are the humane treatment of the animal and the integrity of the hunt. This checklist transforms a hopeful shot into a confirmed one.
Your R.E.S.T. Mental Checklist Protocol
- Range: Is the target within your proven ethical shooting distance? This is based on practice with your specific equipment under various conditions, not a number you read online.
- Environment: Have you accounted for wind speed and direction, lighting, and any potential obstacles like branches that could cause a deflection?
- Stable: Is your shooting position solid? You must have proper support and have established your natural point of aim. A rushed, unstable shot is an unethical one.
- Target: Do you have 100% positive target identification? Is the shooting lane clear, and have you verified a safe backstop behind the target?
This mental framework provides the discipline to pass on marginal opportunities, ensuring that when you do decide to take the shot, it is with the highest degree of confidence. It’s the final piece of the reliability puzzle, linking a well-maintained rifle with a well-disciplined shooter.
By integrating this 15-minute diagnostic routine and a disciplined mental protocol into your pre-hunt preparation, you are no longer leaving the outcome to chance. You are taking active control over your equipment and your actions, ensuring that when the moment arrives, you and your rifle are ready.