The key to a safe and ethical shot isn’t instinct; it’s a pre-programmed mental algorithm that functions flawlessly under pressure.
- This protocol involves overriding the body’s natural adrenaline response with controlled, tactical breathing.
- It requires hard-defining safety boundaries before the shot and understanding that a “No-Go” decision is a mark of discipline, not failure.
- Every stage, from target identification to post-shot weapon handling, follows a logical, repeatable sequence to eliminate critical errors.
Recommendation: Treat every shot opportunity not as a test of marksmanship, but as a test of your decision-making protocol. Practice the system until it becomes your default response.
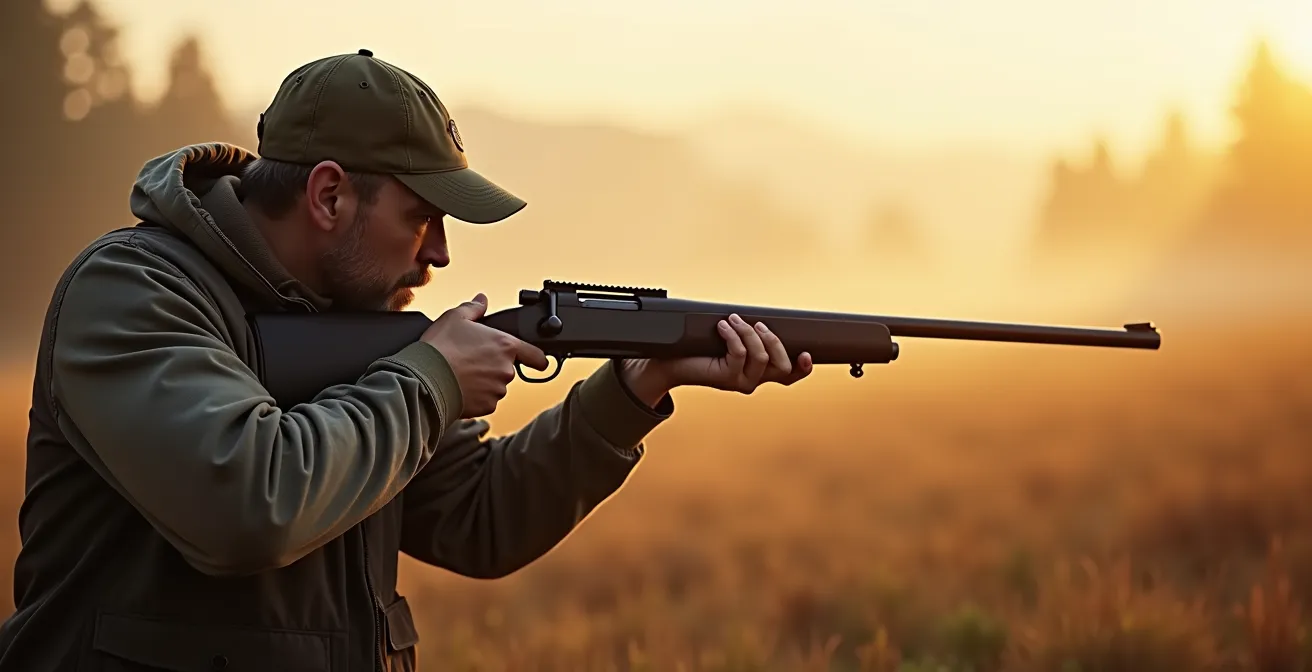
In the field, the moment of truth is a paradox. It is an instant that feels like an eternity, a convergence of adrenaline, anticipation, and immense responsibility. For many hunters, this moment is governed by instinct and hope, a combination that too often leads to hesitation, a missed opportunity, or worse, a decision that is regretted for a lifetime. The common advice—”stay calm,” “be sure of your target”—is correct but incomplete. It tells you the destination without providing a map.
The solution is not to fight the adrenaline or suppress your excitement. The solution is to channel it. The most disciplined hunters, like tactical operators, do not rely on luck or fleeting moments of clarity. They rely on a pre-installed mental program, a “Go/No-Go” protocol that runs like an algorithm in the background. It is a systematic, unemotional checklist that evaluates every critical variable in a logical sequence, transforming a chaotic event into a controlled process. This is not about being a better shot; it’s about being a better decision-maker.
This guide deconstructs that process. We will not focus on what you should do, but on how your brain and body can be trained to execute a flawless decision under extreme pressure. By establishing this internal framework, you move beyond guesswork and into the realm of tactical certainty, ensuring every “Go” decision is safe, ethical, and effective, and every “No-Go” is a deliberate success.
Summary: Mastering the Tactical Go/No-Go Shot Protocol
- Why “Sound Shooting” Is the Most Dangerous Habit in Hunting?
- How to Breathe Through the Trigger Pull to Ensure Accuracy?
- Clock Positions vs. Visual Markers: Which Defines Safe Fire Zones Best?
- The Unloading Error That Happens After the Adrenaline Spike
- When to Abort a Shot You Have Already Started Squeezing?
- How to Evaluate a Natural Backstop in Split-Second Scenarios?
- Zone of Fire vs. Target Fixation: What Is the Difference?
- How to Ensure a Quick Kill That Minimizes Animal Suffering?
Why “Sound Shooting” Is the Most Dangerous Habit in Hunting?
The rustle of leaves, the snap of a twig—these sounds trigger a primal response in every hunter. This auditory cue is the first input in your decision-making loop, but it is also the most corruptible. “Sound shooting,” the act of aiming or firing at a sound without absolute visual confirmation, is not a lapse in judgment; it is a catastrophic failure of the entire Go/No-Go protocol. It bypasses every safety check and bets a life on a sensory input that is fundamentally unreliable. Your ears can tell you *something* is there, but only your eyes can tell you *what* it is.
The danger lies in cognitive bias. Under pressure, the brain seeks to confirm what it wants to believe—that the sound is the game you have been waiting for. This “confirmation bias” is a powerful force that can make a squirrel sound like a deer or, tragically, another human sound like an animal. Data on hunting accidents consistently reveals the lethal consequences of this failure. Target misidentification is not a fringe issue; it is a leading cause, with 37% of firearm-related hunting accidents stemming from this single error. This statistic serves as a stark reminder that the first step of any ethical shot is not aiming, but identifying.
To combat this, you must install a “cognitive firewall” that stops the process the moment an unidentified sound is registered. This isn’t a passive wait-and-see approach; it’s an active, structured mental drill. The goal is to break the subconscious link between sound and action, replacing it with a mandatory “Identify-then-Act” sequence. This discipline is the absolute bedrock of field safety.
Your 5-Step Sound Identification Protocol
- Immediate Pause: The instant you hear an unexpected sound, freeze all movement. Do not raise your firearm. Do not shift your body. This is the initial interrupt in the flawed sound-to-action sequence.
- Challenge the Assumption: Actively ask yourself, “What are three other things this sound could be?” (e.g., a squirrel, a falling branch, another hunter). This forces your brain out of confirmation bias.
- Visual Confirmation: Scan the area methodically with your eyes or binoculars only. The firearm remains in a safe, neutral position. You must see the whole animal and be 100% certain of its identity.
- Maintain Muzzle Control: Throughout the entire identification process, your muzzle must remain pointed in a safe direction. Your trigger finger is outside the trigger guard. This is a non-negotiable state.
- Doubt Equals No-Go: If there is any doubt, any uncertainty, any visual obstruction, the situation is an automatic and irreversible “No-Go.” There is no middle ground.
Treating sound as a point of interest, not a target, is the first and most critical gate in your Go/No-Go system. It’s a simple, binary choice: no visual confirmation, no action.
How to Breathe Through the Trigger Pull to Ensure Accuracy?
When a target appears, your body initiates a chemical cascade known as the adrenaline spike. Your heart rate accelerates, your breathing becomes shallow, and fine motor control deteriorates. This is “buck fever,” and it is the primary enemy of accuracy. Attempting to “fight” this response is futile; you cannot will your heart to slow down. However, you can seize control of the one physiological system that is both automatic and voluntary: your breathing. Tactical breathing is not just a calming technique; it is an adrenaline override tool.
The principle is simple: controlled, deliberate breathing sends a signal to your nervous system that the crisis is being managed, counteracting the “fight or flight” response. A slow, rhythmic exhale is the key. Most misses are caused by jerking the trigger, a direct result of muscle tension and rushed breathing. By focusing on a smooth exhale *through* the trigger squeeze, you decouple the physical act of firing from the body’s panic response. The shot should be a surprise that occurs during the natural respiratory pause at the bottom of an exhale.
This is not anecdotal wisdom; it is a proven tactical principle. A military study found that shooters using tactical breathing techniques scored, on average, 1.9 points better in accuracy tests. This demonstrates a direct, measurable link between respiratory control and shot placement. The “box breathing” technique is a simple and highly effective method to implement this. Inhale for a count of four, hold for four, exhale for a count of four, and hold the empty pause for four. Repeating this cycle just two or three times can dramatically lower your heart rate and stabilize your sight picture.
This conscious control of breath is the master switch that allows your higher-level brain functions to take over from raw instinct, enabling a clear and steady execution of the shot.
Clock Positions vs. Visual Markers: Which Defines Safe Fire Zones Best?
A “Go” decision is not just about the target; it is about the entire space in which that shot will travel. Defining a safe zone of fire is a critical parameter in your mental algorithm, especially when hunting with others. This pre-defines the “No-Go” areas before a target ever appears, reducing the cognitive load in the heat of the moment. Two primary methods exist for this: the clock system and visual markers. Each has a distinct tactical application, and the superior choice depends on the environment and team dynamic.
The clock system is a communication tool. It establishes a shared frame of reference, with 12 o’clock being a mutually agreed-upon direction (e.g., the direction of travel). Each hunter is assigned a zone, such as “10 to 2,” and is responsible for all shots within that arc. Its strength is in dynamic situations where hunters are moving, as it provides a universal, verbal shorthand. However, its weakness is that it’s purely conceptual; it relies on every hunter maintaining the same mental picture of “12 o’clock.”
Visual markers, on the other hand, are physical anchors. This involves identifying distinct, unmovable landmarks in the field—a large rock, a dead tree, a bend in a creek—to create hard boundaries for each hunter’s zone. Its advantage is its physical, unambiguous nature. It helps prevent “target fixation,” where a hunter’s focus narrows so intensely on the game that they lose awareness of their surroundings. The downside is that markers may not always be present or clearly visible in all conditions or terrains. As the Texas Parks & Wildlife Department states in its Hunter Education Course, “Know your safe zone-of-fire and stick to it. Your safe zone-of-fire is that area or direction in which you can safely fire a shot.” Both systems are tools to achieve this singular goal.
The most professional operations often use a hybrid system, establishing hard visual boundaries for the overall area and using the clock system for rapid communication within those pre-defined zones. The choice of method is less important than the act of choosing one and ensuring every member of the party understands and adheres to it without deviation.
| Method | Best Use Case | Advantages | Limitations |
|---|---|---|---|
| Clock Positions | Dynamic communication within established zones | Quick verbal communication, universal understanding | Requires all hunters to share same reference point |
| Visual Markers | Establishing hard boundaries of safe zones | Physical anchors prevent target fixation, permanent reference | May not be visible in all conditions |
| Hybrid System | Professional hunting operations | Combines benefits of both systems | Requires pre-hunt coordination |
Ultimately, pre-defining your zone of fire offloads a massive decision from the critical moment, allowing your protocol to focus on the remaining variables: target, backstop, and execution.
The Unloading Error That Happens After the Adrenaline Spike
The Go/No-Go protocol does not end when the trigger is pulled. One of the most overlooked periods of danger occurs in the moments *after* the shot, during the adrenaline dump. Whether from the excitement of a successful harvest or the disappointment of a miss, the hunter’s focus shifts away from the firearm and onto the outcome. This mental lapse is when the most preventable accidents happen, often due to a failure to properly clear the weapon. Believing a firearm is unloaded when it is not is a catastrophic system failure.
This is not a beginner’s mistake. It happens to experienced hunters whose muscle memory is interrupted by a powerful emotional response. The brain, flooded with post-action chemicals, skips a critical step in the clearing process. The consequences can be tragic, and often self-inflicted. Data from the International Hunter Education Association (IHEA) shows that from 2016 to 2022, 22 of 42 nonfatal shootings were self-inflicted. Many such incidents occur when a firearm is being handled, transported, or put away under the false assumption that it is clear.
To prevent this, you need a “System Purge” protocol—a mandatory, unskippable clearing sequence that is performed every single time you intend to unload the firearm, regardless of the emotional state. This protocol must be both visual and physical. Relying on a visual check alone is not enough, as poor lighting or a partially obscured chamber can deceive the eye. The process must be a deliberate, conscious sequence, not a rushed afterthought.
The key is to create a “clearing ritual” that you practice until it is as ingrained as shouldering the firearm. This involves pointing the weapon in a safe direction, removing the source of ammunition (magazine), opening the action, visually inspecting the chamber, and then physically confirming the chamber is empty with a finger. Verbally declaring “Clear!” can serve as a final cognitive reset, cementing the state of the weapon in your mind. This ritual is your safeguard against the treachery of adrenaline.
Your firearm is not safe until this protocol is completed. There are no exceptions. The hunt is not over until your weapon is confirmed clear and safely stored.
When to Abort a Shot You Have Already Started Squeezing?
The decision to abort a shot is the ultimate test of trigger discipline. It is one thing to decide “No-Go” when the target is distant or obscured. It is another entirely to halt the process when your finger is already applying pressure to the trigger. This is the final gate in your protocol, the last chance to prevent a bad outcome. Aborting a shot is not a failure; it is the successful execution of your safety and ethics algorithm. It requires recognizing a “No-Go” variable at the last possible second and having the mental wiring to stop.
A “No-Go” variable can appear instantly: the animal turns, presenting a non-ethical angle; a gust of wind destabilizes your aim; you suddenly doubt your range estimation; or another animal walks behind your target. At this moment, your body is committed to the act of firing. To stop, you must have a pre-programmed “abort” command. This is where the American Hunter Editorial Staff offers critical advice: “If you simply cannot get yourself calm, don’t shoot. It’s better to leave the bull undisturbed and hope for another opportunity than to miss or wound him with a bad shot.” This must be your guiding principle.
If you feel your heart rate spike or your sight picture wobble mid-squeeze, the protocol is to stop, take your finger off the trigger, and re-initiate your breathing sequence. One of the most effective tools for this emergency reset comes from the world of special forces.
Case Study: Military Special Forces Breathing Protocol
Special forces operators use a specific breathing exercise when adrenaline compromises shot placement: Breathe in for 4 counts, hold for 4, and exhale for 4. This technique, repeated three times, effectively reduces heart rate and respiratory rate. It creates a “cognitive pause,” allowing for a clear-headed decision to either abort the shot entirely or re-engage with a controlled, stable platform, even after the initial squeeze has begun.
Remember, the trigger is not a one-way switch. You have control until the very moment the firing pin falls. A shot not taken for the right reason is a perfect execution of your training.
How to Evaluate a Natural Backstop in Split-Second Scenarios?
Knowing your target is only half of the equation. Knowing what is behind it is the non-negotiable component that ensures a safe shot. A projectile can travel for miles, and you are responsible for it until it comes to a complete rest. In a split-second scenario, you don’t have time for a lengthy analysis of the terrain. Your Go/No-Go protocol must include a rapid, near-instantaneous method for evaluating the safety of your backstop. A poor backstop is an automatic “No-Go,” regardless of how perfect the target presentation is.
The ideal backstop is a substantial mass of soft material, like a hillside of dirt or sand, that will reliably absorb the bullet’s energy. The most dangerous situations involve hard, flat surfaces that can cause a ricochet. These include: * Rocky ground: Unpredictable ricochet angles make this an unacceptable backstop. * Water surfaces: Bullets can skip across water for a significant distance, much like a stone. * Frozen ground: Behaves like rock or concrete, posing an extreme ricochet risk.
To streamline this evaluation under pressure, a simple mnemonic can be integrated into your mental checklist. The A.B.S. Mnemonic provides a framework for a 2-second assessment: * A – Angle: Is the surface angled in a way that could deflect the bullet into an unsafe direction? A steep, perpendicular hill is good. A shallow, angled rock face is bad. * B – Bulk: Is the backstop large and thick enough to stop the bullet, even if you miss the target by a foot or two? A small berm is not sufficient. * S – Substance: Is the material soft enough to absorb the projectile’s energy (earth, sand) or is it hard and likely to cause a ricochet (rock, ice)?
If any one of these checks fails, the shot is aborted. This rapid assessment must become an automatic part of your sight picture acquisition. You see the target, and in the same cognitive frame, you see and analyze the backstop using the A.B.S. criteria.
This table provides a clear safety hierarchy for common backstop materials, which should be memorized until it becomes an instinctive part of your evaluation.
| Material Type | Safety Rating | Ricochet Risk | Acceptable Distance |
|---|---|---|---|
| Soft Earth/Sand | Ideal | Minimal | Any |
| Dense Woods | Good | Low | Under 200 yards |
| Rocky Ground | Poor | High | Never acceptable |
| Water Surface | Dangerous | Very High | Never acceptable |
| Frozen Ground | Unacceptable | Extreme | Never acceptable |
No trophy is worth a bullet sent into an unknown space. The integrity of your backstop is a final, absolute gate in your decision to shoot.
Zone of Fire vs. Target Fixation: What Is the Difference?
In the moments leading up to a shot, the human brain is susceptible to a dangerous cognitive phenomenon: target fixation. This is a form of tunnel vision where your entire perceptual world narrows to the target, causing you to lose awareness of your surroundings, including your pre-defined safe zone of fire and the location of your hunting partners. Understanding the difference between maintaining focus on your zone of fire and succumbing to target fixation is a critical distinction in your mental protocol.
A zone of fire is a wide-angle concept. It is a pre-agreed sector of responsibility that you are continuously aware of. Your focus is broad, scanning the entire area for the target, your backstop, and any potential hazards. Target fixation is a narrow-angle trap. Once the target appears, your focus collapses onto that single point. The rest of the world fades away, and the established rules of your safe zone can be forgotten. This is where accidents happen, as a hunter might swing their firearm outside their safe zone while tracking a moving animal. Failures in communication and situational awareness are a significant factor in these incidents.
The key to preventing target fixation is to train your brain to maintain a “wide-screen” view even when acquiring a specific target. This is a learned skill that can be developed through specific drills, even during dry-fire practice at home. The goal is to force your brain to break the tunnel vision and re-engage your peripheral awareness before committing to the shot.
Implement these anti-fixation exercises into your practice routine: * Blink and Scan: While aiming, deliberately blink hard, then consciously shift your gaze to the left boundary of your safe zone, then the right, before returning to your target. This forces a mental reset. * Time Limit: Use a timer during practice. Do not allow yourself to aim at a target for more than 7-8 seconds without performing a blink-and-scan reset. This prevents your focus from locking in too deeply. * Verbal Confirmation: Before you decide to shoot, verbally state your boundaries out loud (or in your head). “Target is at 1 o’clock. My zone is 10 to 2. Backstop is clear.” This verbal act reinforces the wider context.
Your responsibility is not just to the target, but to the entire zone you command. Maintaining that broad situational awareness is a non-negotiable part of the Go/No-Go protocol.
Key Takeaways
- Your senses can lie under pressure; only 100% visual confirmation of your target and what is beyond it constitutes a “Go” signal.
- Controlled breathing is not a suggestion; it is your primary, non-negotiable tool for overriding the physical effects of adrenaline and maintaining clear judgment.
- A “No-Go” decision, even at the last second, is not a failure. It is the successful execution of a disciplined and ethical hunting protocol.
How to Ensure a Quick Kill That Minimizes Animal Suffering?
The final step of a successful “Go” decision is the execution: placing a shot that ensures a quick, humane, and ethical kill. This is the ultimate objective and the culmination of your entire protocol. An ethical shot minimizes animal suffering and ensures a clean recovery. This requires a deep understanding of animal anatomy and knowing precisely where to aim to impact the vital organs for the most immediate effect. A shot at the “vitals” is the goal, but “vitals” is a broad term. Precision is paramount.
For most big game animals like deer, the most effective shot placement is the double-lung or heart-lung shot. This target area offers the largest margin for error while guaranteeing a rapid loss of blood pressure and consciousness. Aiming for the head or neck is a high-risk, low-reward proposition; the target is small, and a slight error can result in a horrific, non-lethal injury. The core of your shot placement knowledge should revolve around the vital triangle, located directly behind the front shoulder.
Study: The DRT (Drop Right There) Shot Placement Method
Research from the National Deer Association has validated the “crosshair intersection method” as one of the most consistently effective for ethical kills. This involves visualizing a vertical line running up the middle of the front leg and a horizontal line splitting the animal’s body into top and bottom halves. The point where these lines intersect is the ideal aiming point for a broadside shot. This placement strikes the top of the heart and both lungs, typically resulting in a quick expiration and minimal tracking.
However, shot placement is not a static calculation. It changes dramatically with the animal’s angle and your position. As the onX Hunt Editorial Team points out, “The best shot placement adjustment to make from a treestand is to think only of the exit point for your shot, which will change dramatically depending on the height of your stand.” For a quartering-away shot, you must aim further back on the ribcage to ensure the bullet passes through the vitals toward the opposite shoulder. For a quartering-to shot, the margin for error is much smaller, and it’s often a shot that a disciplined hunter will pass on.
Mastering this final step transforms you from someone who simply shoots at animals to a true hunter who harvests them with respect and efficiency. To put these principles into practice, your next step should be to dedicate significant time to studying animal anatomy charts and practicing shot placement on 3D targets from various angles and elevations.